SSH
SSH (Secure Shell) is a network protocol that enables secure remote login and command execution over insecure networks.
Using SSH, users can securely access container instances on the platform from their local machines.
Log in to a Container Instance Using SSH Username/Password
-
In the container instance's terminal, check whether the SSH server is installed.
If this returns the path to
sshd, skip the installation. Otherwise, runcat /etc/os-releaseto identify the container image's Linux distribution, then run the matching installation command as root.Linux distribution Installation command Debian / Ubuntu apt-get update && apt-get install -y openssh-serverFedora / Rocky Linux / AlmaLinux dnf install -y openssh-serverCentOS / RHEL images using yum yum install -y openssh-serverAlpine Linux apk add --no-cache openssh-serverAfter installation, run
command -v sshdagain to confirm that the server executable is available. Installing onlyopenssh-clientor findingsshin a package list does not confirm that the SSH server is installed.Before logging in, also ensure that the SSH server is running, using the image's startup mechanism. Installing the package does not mean the service has started, and container images do not necessarily use systemd. See Service Auto-start to configure services in a container instance.
-
After the container starts, click the SSH Login button in the container instance list to open a dialog with login information.
-
Use the provided username and password in your local terminal to log in. If successful, you'll see a confirmation message:
Passwordless SSH Login
After importing your SSH public key in User Center → SSH Keys, newly created or restarted instances will support passwordless login.
Step 1: Check for Existing SSH Public Key
Before generating a new SSH key, check if you already have one. SSH key pairs are usually stored in the local user’s home directory.
For Linux/macOS, use the commands below.
Windows users can use WSL (Windows 10+) or Git Bash.
-
ED25519 key:
-
RSA key:
If a long string starting with ssh-ed25519 or ssh-rsa is returned, a key already exists.
You may skip Step 2 and proceed to Step 3.
Step 2: Generate SSH Key
If Step 1 returns nothing, generate a new SSH key:
-
Open your terminal (on Windows, use WSL or Git Bash) and run
ssh-keygen. -
Choose the algorithm and optional comment (usually your email address):
-
For ED25519:
-
For RSA:
-
-
Press Enter to accept the default save path:
Example (ED25519):
- Private key:
/home/user/.ssh/id_ed25519 - Public key:
/home/user/.ssh/id_ed25519.pub
- Private key:
-
Optionally set a passphrase:
You can leave it empty to avoid entering a password every time.
-
Press Enter to complete the key pair generation.
Step 3: Copy Public Key
You can either copy the key manually from the terminal or use one of the following commands depending on your OS:
Step 4: Add SSH Key on the Platform
-
Log in to the d.run UI, and go to User Center → SSH Keys.
-
Paste your SSH public key into the input field.
<!--
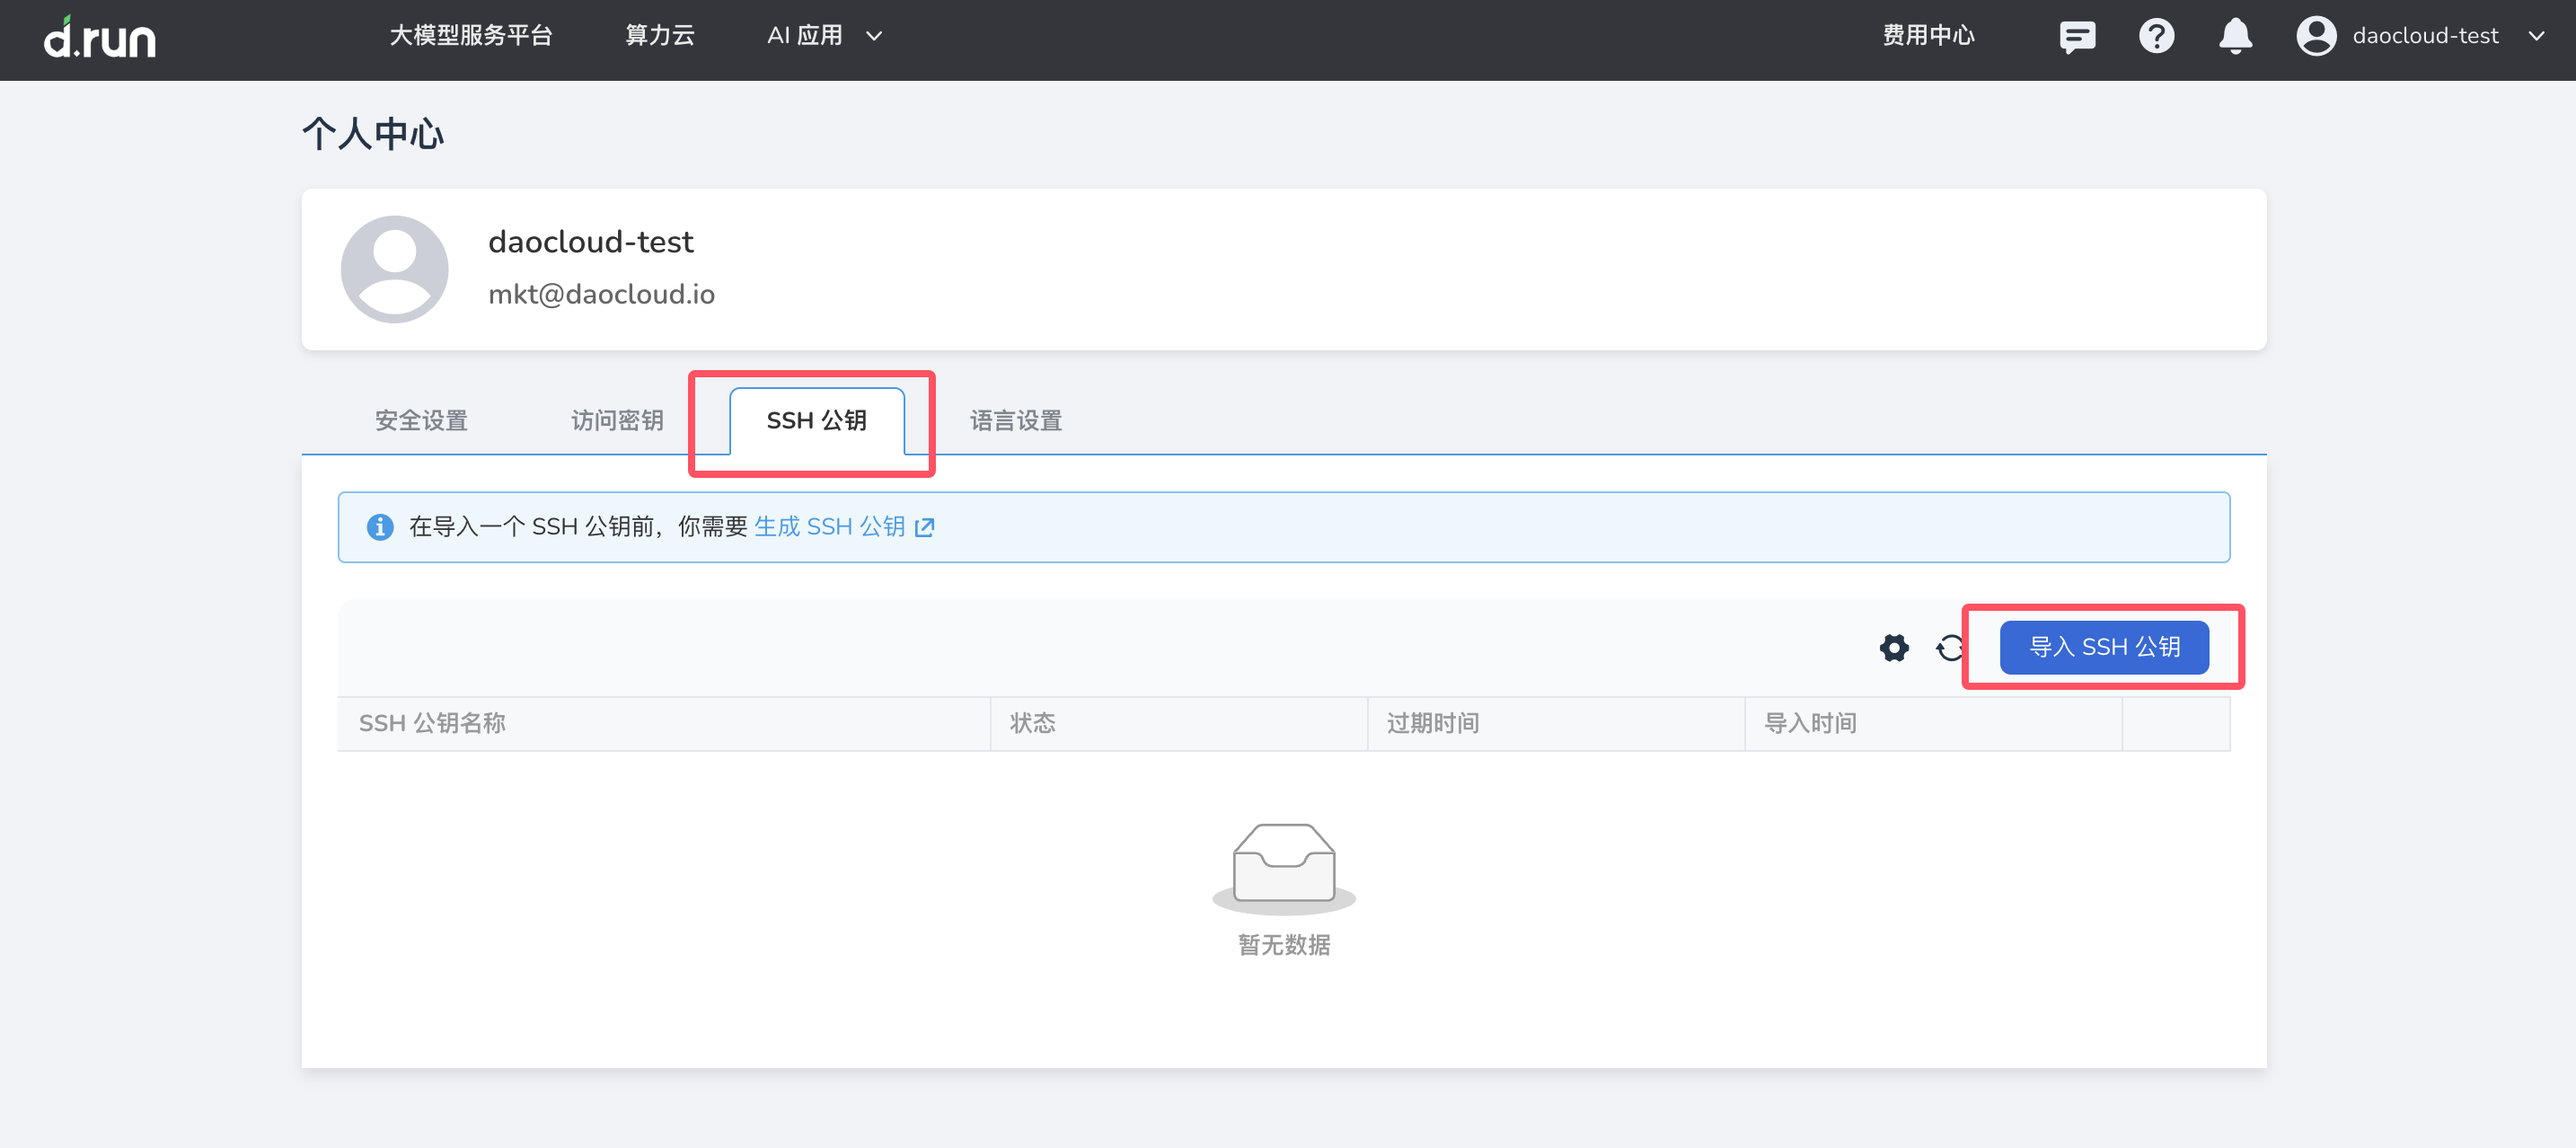
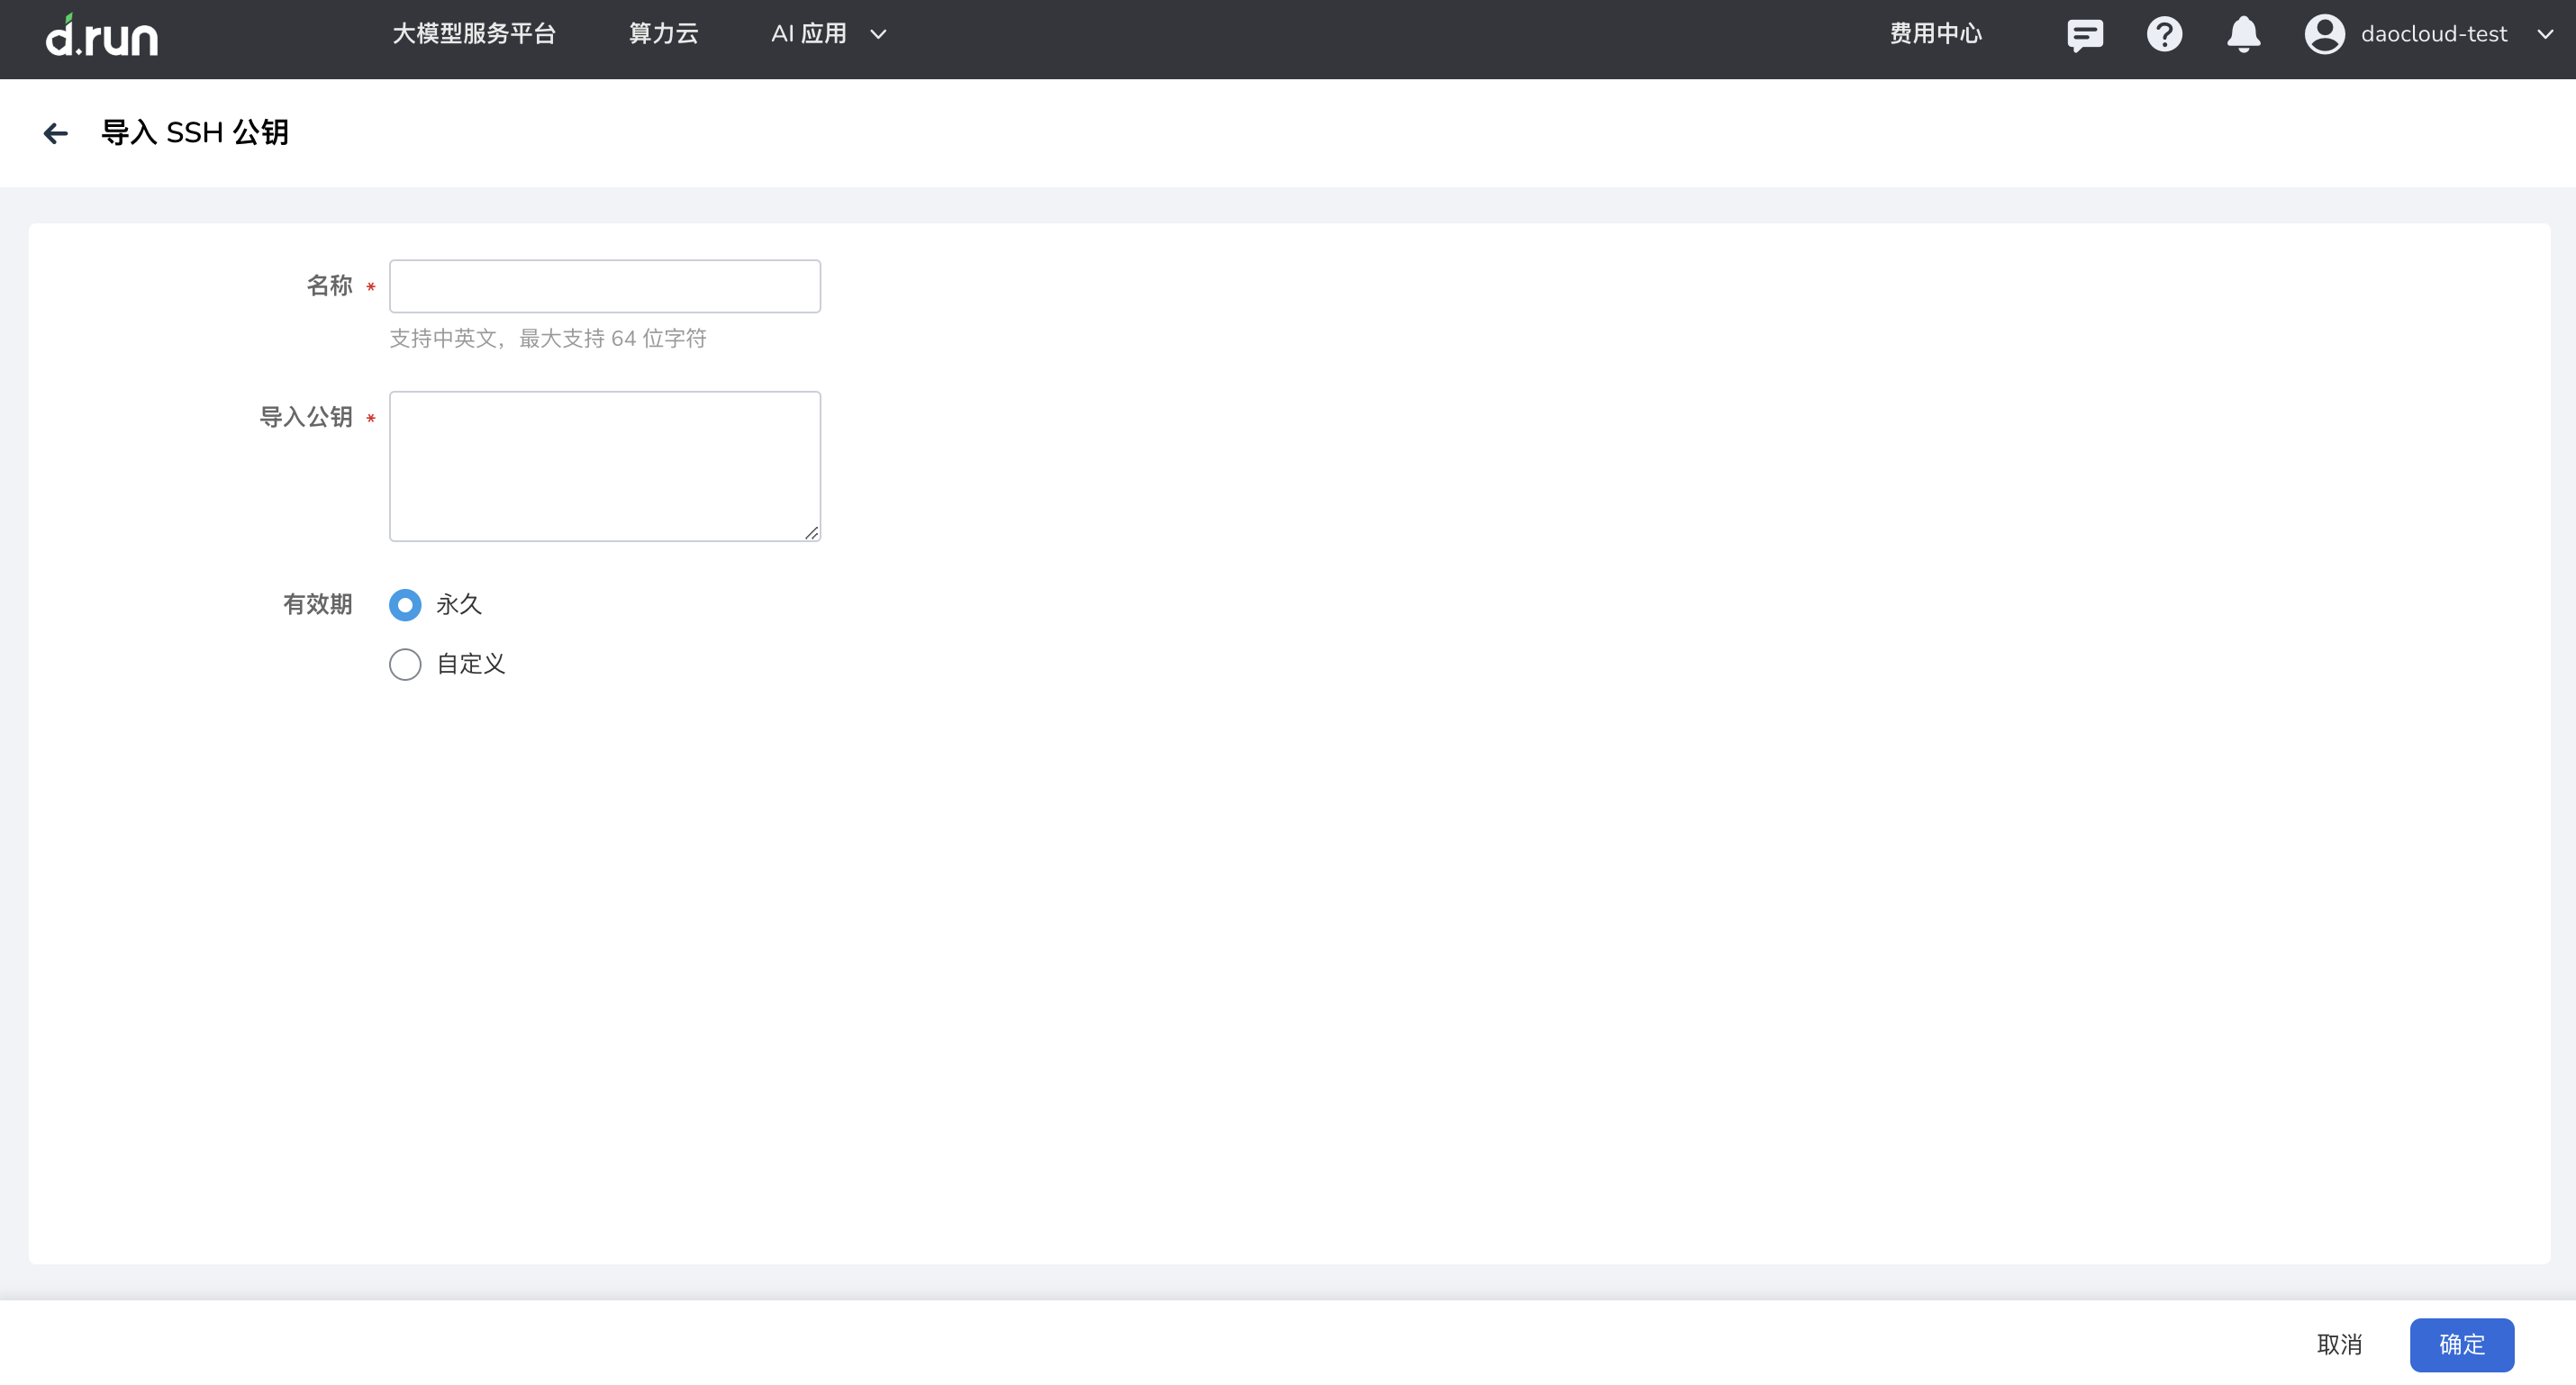 →
→- Key Title: A name to help you identify the key.
- Expiration Time: Set a key expiration date. The key becomes invalid after that time. Leave blank for permanent validity.